Showing posts with label tutorial. Show all posts

Monday, September 28, 2009

Toothbrush Rugs: Don't launder, used a foaming carpet cleaner & My most elaborate "pattern rug" explained

Summer is usually the down time for toothbrush rug making... you're outside, in the garden, hiking, etc.

For years, one of the "selling points" I've used for these rugs is that you can put them in the washer.

This is true- you CAN.
Years of accumulated experience however has led me to the conclusion that this is not the best way to clean them for the following reasons:
  • It reduces their life span
  • They are hard to dry
  • Non-colorfast fabrics can bleed out and affect the other fabrics or items in the washer.
Plastic bag rugs, ones made from umbrellas and hosiery are not damaged and you don't generally have the color bleeding problem, but plastic bag rugs are the hardest to dry of all!

From now on, the only ones I'm even going to consider laundering are ones made from hosiery or similar.

Instead, I suggest the following three step process:
  1. Take the rug outside and give it a good shake. If you want to get in touch with your inner pioneer / Amish person, even hang it on a line and beat it out.
  2. Spray the rug with a foaming carpet cleaner- both sides
  3. Vacuum it up with a shop vac or a normal floor vac set to rug / carpet, again both sides.

This will clean the rug at least as well as washing it, it will last longer, and you don't have the "how do I get this thing to dry" problem.

With fall blowing in (we're under a high wind advisory today, the phrase is literally true here) I'm sure my mind will be back in this groove more often in the future.

The picture above is of my mother holding my most elaborate and successful pattern rug. I call it my "Berger rug" because I made it for Berger Park in Edgewater, the neighborhood in which we lived in Chicago.

Its an abstract / symbolic rug of Lake Michigan and its shores.

  • The blue center is the lake.
  • The tan area is the shore and the dunes in Indiana.
  • The light green on the right is the fertile farmland of the lower peninsula of Michigan.
  • The dark green on the top and left is the the wilderness of the UP of Michigan & Wisconsin.
  • I bet you can guess the final rings of blue and white- the sky.


Creative Commons License
kicking a man already falling down by Rev Peter (Mr. Dr. Tess) List is licensed under a Creative Commons Attribution-Noncommercial-No Derivative Works 3.0 United States License.
Based on a work at listig.multiply.com.
Permissions beyond the scope of this license may be available at listig.multiply.com.

Monday, July 20, 2009

Planning the colors for a rug: A conversation with my mother about a most atypical rug

Some time ago, I set my new camera up on a tripod and shot some videos of me and my mother doing "ruggy things." This was one of the better videos of that lot, though I do notice that the camera couldn't make up its mind what the color temperature of the lighting was.


Thursday, October 30, 2008

2 Parts Frustration + 3 Parts Boredom + 1 Part Ingenuity = Rug needle made from a discout key fob


While my wife was in the hospital, I took a rug with me back and forth to work on while on the CTA. One day I made the mistake of leaving it in "Savi land" and she decided the needle was a chew toy. I got it back, but forgot to put it with the rug.

BIG MISTAKE!

 We show up for her follow up apt. after discharge and... no needle. Initially I tried using a key, but the head of the key was just too fat to fit through. Then frustration and ingenuity came together, and I cut up one of my discount key fobs, and it worked. It wasn't ideal- it was a bit shorter than I'm used to, and I was always worried about giving myself a hellacious papercut, but it worked! I love the "make do with what you have on hand" aspect of this craft!

You can see me discussing this in the video below, and also see the canine culprit, angelic papillon puppy Savina...


Watch Toothbrush Rugs: Discount Key Fob as an emergency needle in Video Blogs and How to Videos  |  View More Free Videos Online at Veoh.com

Wednesday, June 4, 2008

The monarch rug finished & tutorial on matching an orphan color/pattern

I finished the "monarch rug" today, which is apt, since my wife loves it and helped me plan it, and today's our 13th anniversary.

So we will be keeping it, though I have very similar materials around should anyone see it and want one like it.


Here's two videos I shot with Tess as we planned the final row. The challenge was how to finish off the rug in a way which tied back into the center when I'd used up the entire sheet on the center. So these videos give you a glimpse of our artistic process, and our loving interaction.

It can be frustrating when you use a one of a kind fabric and then need to duplicate the effect of it, but we made it fun, and I hope you can have fun with it too.


Part I


Online Videos by Veoh.com


Part II


Online Videos by Veoh.com

Wednesday, April 9, 2008

On the poll, and on the new link

One of my faithful readers told me about another site which has a tutorial. I've not had time to watch her videos (I should really be studying for my Anatomy exam right now) but I wanted to tie up some loose ends (if you'll forgive the pun).

About the poll- my wife is still too sick to assist me with either doing the sewing or holding the camera. So the improved tutorial showing the needle work more explicitly will have to wait for her health to improve.

Someone suggest diagrams... which would be a GREAT idea if I could draw, but I can't. This is the ONLY handcraft I do... all my other artistic endeavors involve the mediation of machines (photography, video, writing.)

So the options are...
  • A video showing the process from a better angle with better lighting and more explicit commentary.
  • A slide show with annotated pictures and my narration.

Wednesday, January 30, 2008

Q&A on rugs coiling up, buckling, cuping up, etc.

A youtube viewer of my videos, Rona, asks, "when making a rug do they tend to coil? or am I doing something wrong"

They do tend to cup up, this is very common, especially if you pull your stitches tightly as I do and my late grandmother did. She did hers so tightly she had to put piles of dictionaries on them for months to flatten them out.

The basic reason why this happens is that as you spiral your way outwards, each row is longer than the previous one. With my rugs, I've found they tend to increase by about an inch for each row on a round rug.

To address this, you need to add extra stitches called "doubles" or "duplicate" stitches, where you pass through the same bottom/base loop twice. If you don't, you wind up with a very thick stocking cap! (In fact, just for fun, I once made a stocking hat for our dog using very thin strips and this method.)

Generally, you need more double stitches early on- in the first 7 to 12 rows (when the rug is smaller than 16" across) than later.

For the first few rows, you might need doubles every other stitch.

Generally I recommend doing a double stitch every other stitch the first 4 to 6 rows, every third stitch the next 4 rows, and then go by feel.

This will vary by how tightly you stitch and which kind of material you use. The most fool proof method which I'll demonstrate when my wife is up to helping me do a video project is this: Look at the angle your needle is making between the baseloop and the top loop. If it is leaning backwards more than 30 degrees, its time for a double stitch.

Some people have trouble gauging this though, so a similar method to determine whether its time for more doubles is to just put the rug on a flat surface. If you can't make it lie flat easily, with very little effort, then you need to add more doubles.

If you are using a fabric which has spandex or a lot of give to it, you'll need to use a lot more double stitches, up to twice as many, which is one of many reasons I discourage beginners from using these materials until they are more confident with the technique.

Similarly in the opposite direction, plastic bags and very sturdy denim can be most unforgiving... they don't flatten out well.

If you have any more questions about this or any other issue, please post them. I love questions from you- it helps me know what I should be posting about, and helps me refine my teaching technique.

Tuesday, January 29, 2008

Q&A on rug starts, continued

This picture is of the BACK of my "magnum opus" Anniversary Rug, the one shown in front view, B&W, in the letter in the Chicago Tribune.

Click on it to make it large- see that "v" shape, with the tail coming off the top left? That's a "fix" I did because the material I used to start this rug wasn't sturdy enough. As the rug grew to immense size, I noticed it was tugging pretty hard at the center. So I reinforced it using the same technique shown in the video series with my mother.

The moral of the story... even if you plan to use something with a loose springy weave for most of the rug, make your start (up to at least 5 rows) from a fabric which does NOT stretch and is very sturdy.
Your basic cotton poly blends in a normal dress shirt or sheet work great, or you can even go with something more rugged like a light denim or men's dockers style pants.

I have gotten some more great questions here and on Youtube, and I'll be working to answer them both text and video. Thanks very much! I love getting questions, it helps me refine my teaching technique, and tells me what you need! I'll do it with my wife, since she's just learning to make the rugs herself, so she also asks good questions.

Monday, January 28, 2008

Q&A on how to start a rug, and which materials to use, carried over from Youtube

Over on Youtube, a person on viewing both my starting a rug from a braid and starting a rug using the half hitch method had this to say on the braid video when I suggested the half hitch as better:


I saw that one first but didn't strike home until I saw this one. Couldn't quite figure out where you were going with the half hitch.. why it was "easy". Makes sense now. (scurries away to find hubbies old t-shirts to practice with)

First off, some historical background: This being a folk craft, the way it was taught and handed down in the past was by expert rug makers mentoring novices. This usually involved the mentor MAKING the first half dozen or so rug starts. The logic was... once you get comfortable with the stitch, once you get used to the fact that you can make "mistakes" and it will self-correct, you can better cope with making that great leap from a chain stitch or a braid to a regular row. I was making these rugs for almost 10 years before I did my first start.

I still think this is sound and is the best way, but over the years I've been teaching this, even though I can knock off a start in the time it takes me to walk the two blocks to the grocery store (and yes, I do stitch and walk at the same time... one of these days we'll have video of it) and have offered them to anyone who wants them, I found that anyone who wanted to learn the craft wants to know how to do it from start to finish.

I've struggled with how to teach this for years (I've been making these rugs over 30 years, and teaching the craft over 20, and mind you... I just turned 40), and its only recently that I decided it was plausible. To key things went into this:

1) The advent of inexpensive high quality video cameras (and if you've only seen the Youtube versions, wait till you see the Veoh versions below... Veoh streams at full D1 analog TV quality!)
2) I made a concerted effort to forget what I knew in terms of how its "supposed" to work, and come at it fresh.

Now... on to the issue at hand about starting rugs. While I do think the series of half-hitch knots is the best way to make an easy and strong start, really the best way for anyone is the one you can "grok"- grasp and put into effect. (Objectively speaking though, braids and half hitches will give a stronger center than a chain stitch.)

Which ever method you use, the trick is always the point at which you go from your start method... which ever it is... to doing the stitch. And that is pretty much the same which ever you use. You need a thumb loop and a base or bottom loop. How you get the thumb loop and how you decide which is your base loop is utterly irrelevant.

  1. For the first stitch, just go through the first base loop and twist the thumb loop over.
  2. You'll probably need to go through the same bottom loop for your second stitch, and after this, it should look almost like a normal stitch.
  3. By the third stitch, which you can probably do on the next bottom/base loop, it will look and act like it should.

The other tricky thing is, for the first few times around the ends, you'll need to do triple or even quadruple stitches, and early on in a start, especially for a round rug, its not uncommon to need to do a double stitch every second or third stitch. When I learned, I asked my mother and grandmother for a mathematical ratio (so many doubles per row, decreasing at at a given rate for each succeeding row) because I always mix science with my art, and art with my science.

And if you would find that helpful... then here ya go... until the rug is well established, do a double stitch every other stitch for the 2 rows, then every third stitch for the next 2 rows, and so on. If doing an oval rug, that only applies to the ends.

That's not as exact as it sounds... it depends somewhat on how tightly you stitch and whether or not you use fabric with give, but I'm assuming (and dearly HOPING) a beginner isn't going to try using old pantyhose for his/her first rug! (Old hose make lusciously beautiful rugs which feel like you're walking on moss, but they are a devil to work with... you can't overpull or underpull or else it cups and pulls and ruffles...)

And speaking of fabrics with some give... my correspondent spoke of using T-shirts.
They make fine rugs, and they're the sort of clothes most people have a pile of which should be recycled. (I'm wearing one such at the moment... the armpits are stained and are starting to come open, but... I digress.) Two major things to keep in mind when using fabrics which either have spandex or an open weave such they stretch is...
  1. you will need to cut your strips up twice as wide as if you were using- say- an old dress shirt or bedsheet.
  2. you do need to be careful to not pull the stitches too tightly, or else the rug will cup up into a basket. If you do find yourself pulling tightly, you can compensate by adding more double stitches.
When possible though, the best material for a beginner to work with is an old bed sheet or an old shirt or dress made of a cotton poly blend with NO spandex. You can cut nice long strips with these, you don't have any tension issues to worry about, they slide through the loops easily, etc.

(I thought my poor wife was going to stick her needle through my septum when she came to her next fabric and it was cut from a lovely purple pair of corduroy pants! Cords are as heavy as jeans, but the nubbies make it stick to itself like velcro! )


Here's the high res Veoh versions of all my recent toothbrush rug tutorials and stories:

Online Videos by Veoh.com

Tuesday, January 15, 2008

The problem of lint

I post my rug videos on several services and on my other sites, and on one of them the following comment was left after my previous video on starting a rug with the half hitch knot:

the half hitch was used for macrame! I should be able to do that! [Rug Goth] do you guys have a problem dealing with the floating fibers? I have been waiting to work on my rug until I can sit out side on the porch because the fibers really fly about the room. I have it all over my clothes, the chair I'm sitting in and I feel as though I'm breathing them. Maybe it is just eh material I'm using?


My response:


I'm not surprised- its the basic knot behind many crafts. Yeh, this is MUCH easier and quicker way to get a good start than the braiding or chain stitching most rug makers use.

Funny you should mention the fiber problem. One of the videos I have from my trip back to your 'hood is of my mother talking about my Grandmother- the rug matriarch who got us all going on this- who refused to use cotton or linen after a while, and used only cotton poly or synthetics for just that reason.

Its also something of a matter of how you cut it. This makes a big difference in, say, working with jeans or cords. If you cut with the natural grain of the fabric, it will fray out a LOT less.

Broadcloth, your light weight cotton poly blends as used for men's dress shirts, clerical shirts, many blouses, etc. doesn't fray unless you go out of your way to make it do so, like cutting diagonally across it!

T-shirt and jersey mat'l doesn't either, though you do have to cut your strips extra wide- at least double the normal width- to account for how stretchy they are.

Generally, the tighter the weave and smaller the fibers, the less lint. I used a few strips of a very coarsely woven shower curtain (think burlap) a few times in my anniversary rug, and I had one strip left over which I worked into my new "remnant/romper room" rug, but that was just too much for me.

Since I swiffer and vacuum several times a week to deal with the dog hair and grime (we have all wood floors- if I don't keep up with it, it feels like we're living on a beach!) , it doesn't usually bother me, but that stuff lost about 1/2 its width after an inch and half of stitching!

Plastic bags and pantyhose of course yield no lint, so if that's your "prime directive" go with them.

Bed sheets are great too.

Dockers type pants/slacks, anything remotely like denim, is going to give you a fair amount of lint.

Perversely, even though Grandma preferred synthetics, after the shower curtain the worst lint problem I've ever had was with some really tacky old K-mart special "dress pants" from the 80s. The weave was loose, the fibers thick, and being synthetic, they stuck to everything like glue. I think I finally consigned that stuff to doggy-bed purposes too.

Monday, January 14, 2008

Tutorial & video: The easiest method to start a rug & chosing colors

I stumbled across this idea when I was tying off a little trivet I made while my wife was in the hospital. I noticed that the series of half hitch knots I made around the hanging loop looked for all the world like the normal row... much more than braids or chain stitches do.

My wife is home from the hospital now, and as she's learning the craft, she was watching and filming it.

My papillon Hilde makes a cameo.

At the end I give some guidance about how I chose the colors for a rug- I start with the start, and follow the "dao" of the rug from there.

Hilde my papillon always wants to be involved with the rugs I make, even the starts, so she provides comic relief!

Text tutorial

Take a thick or heavy strip-in the video I use the button holes strip from a blouse- this will be what you tie around, like the green pole in the picture.
Splice a piece of rug material to it, and from the splice end, start tying a series of half hitch knots until you have a long enough start-
* For a round rug, anything under 6 inches should work, but 2 or 3 inches is sufficient.
* For an oval rug, you'll need one much longer
* For a square or rectangular rug, you'll need a start as one long as your longest edge.

When you have a long enough start, create a loop around your thumb
Insert the needle through the SECOND loop to the right, and use the first loop to the right as your "top loop". You won't have a "middle loop" on this stitch, but you will the next, don't worry!
Twist your thumb loop over, and voila, you're stitching a rug!

For the first stitch you'll probably need to do a double stitch, but after that you won't need to do any more than normal.

Going around the ends the first few times, you may even need to do a couple of triple stitches.


Youtube version


Veoh- Highest Res


Online Videos by Veoh.com

Thursday, January 10, 2008

Advanced Technique: Mending a rug made weak by wear or by canine chewing

When I was last home, my mother wanted me to show her how I use the same basic technique as is used to make the rugs to mend them.

Though these rugs are durable and are known to last DECADES, sometimes due to a weak fabric, a thin strip, loose stitching, or canine chewing, holes and weak spots develop.


The videos


In high quality Veoh only... if you have trouble with viewing them, try them on Google Video or Youtube.


Mending a rug, part 1


Online Videos by Veoh.com

Part 2


Online Videos by Veoh.com

Part 3


Online Videos by Veoh.com

Part 4


Online Videos by Veoh.com

Part 5


Online Videos by Veoh.com

Part 6


Online Videos by Veoh.com

Part 7 Final


Online Videos by Veoh.com

Rug making tips from my sister

My sister is also a master rug maker, though she does things differently than I do (she stitches more loosely, etc, calls it a pick not a needle, and so forth.) When I was last back home I asked her to share her wisdom and encouragement, and here it is!


Online Videos by Veoh.com

Thursday, January 3, 2008

Tutorials: Finishing a rug, finishing off a solid color row


Background: I was finishing the rug made of the clothes my wife and I wore when we wooed and fell in love 13 years ago, and as she was in the hospital, and the rug celebrates our love and marriage, I lugged the huge rug down on the L and bus to finish with her.

(In a future post I will show detailed pictures of this, my "opus magnum" so you can see more detail. But for ease of people finding tutorials about various topics, I'm keeping those sorts of posts separate from these.)


When I was doing it, she wanted me to explain how you finish a color band row or solid color row, and as I had the camera along to take stills of her with the rug anyway, I recorded my final stitches and tying off of the rug while explaining it to her and answering her questions.

The lighting gives a spooky or film noir overtone, but I think the video is made better by my wife's interaction, as while a brilliant linguist and utter genius, she's just started doing this craft.


Finishing a row of one solid color


When finishing off a row of a given color or pattern, it is best to overlap by a few stitches so that the color is joined when the rug is viewed from any angle. This is especially important when the row is the final row of a rug, as in this case.

High res Veoh version


Online Videos by Veoh.com


Low res Youtube


Tying off the rug


When you're done with your rug, there's any number of ways to tie it down. The stitch is incredibly resilient, it isn't going to unravel or pull loose regardless. Still, this is how I usually do it.
  • I do the last few stitches very tightly (even for me)
  • I use a thinner strip or a graduated strip for an even blending of the end of the row into the preceding row.
  • For the final stitch, I pull it down as tightly as I can,
    • I run the strip in a basket weave pattern (over under) for three loops along the row,
    • I do three loops in the other direction along the previous row
    • And finally I tie it off using two half hitch knots (see previous post about these.)

Again, don't worry, do what ever you want and what ever works for you, but this technique will give you a clean visually attractive finish.

High res Veoh version


Online Videos by Veoh.com

Low res Youtube version


Wednesday, January 2, 2008

Starting a rug using overhand and half hitch knots


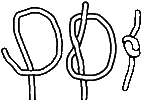
I'm always learning new things about this craft, just by paying attention to what its telling me. This morning I was tying off the end of a rug start I decided to convert to a trivet (you'll see it in the original untied form in a post later today or tomorrow) so when I pulled the stitch tight then created a hanging loop, I decided to just continue knotting the rest of the strip above the knot which formed the far side of the hanging loop, using your basic half hitch knot (which is also commonly though somewhat inaccurately called a slip knot.)

When I looked at the finished product, I realized this would form a terrific rug start, and is much easier than braiding or chain stitching as well as providing a good sturdy start which would hold up no matter how much tension you put on your stitches.
Below is a picture of the result.


Playing with the concept more, I discovered another and possibly easier method- the overhand knot. This may well be the easiest most fool proof method of starting a rug yet! Take a LONG piece of your center color strip and just tie a series of overhand knots by folding it at the center and continuing to tie knot after knot until you have a start long enough for your needs (6" or shorter for a round rug, 6"+ for a an oval rug). When you're almost out of strip, either create one chain stitch or double the strip back through the end slit to create a thumb loop, and proceed with the start as with a chain stitch or braid.

Sunday, November 25, 2007

A silk purse from a sow's ear: Making a rug from umbrellas and shower curtains / Intro to using plastic bags of all sorts

I like to say that toothbrush rugs are essentially making a silk purse from a sow's ear... here I prove it. I use two umbrellas to add on to a rug started from a shower curtain.

As usual, mixed in with the action I give tips and tricks of the craft, and a special feature of this series is Tess is in the room off camera and we have some nice flirty badinage.


Part I: Finishing off an umbrella done in by a recent wind storm in Chicago

Wind... in Chicago... how could that be?! *grin*

Online Videos by Veoh.com

Part II: Destroying for rug making purposes an umbrella which we have no intention of using because it triggers bad memories for us...

So not only are these rugs a way to preserve GOOD memories, but a way to redeem bad ones... its fun to take something which reminds you of a bad experience, cut it up, and put it in a rug!

Online Videos by Veoh.com

Now we move from DEstruction to CONstruction

I cut a strip from the black umbrella, and add it to a rug I'd started from a shower curtain. Now, usually rugs made from plastic materials are pretty bland looking- think about the colors grocery bags come in!- but this one will come out very lovely I think.

Other people have been known to use bread bags and newspaper bags, including my own dear mother. More power to them! These bags tend to be stretchier and have more friction, so you need a looser stitch than I am wont to use. But if you want to do it... why not! Just be aware that if you pull too tightly, the bags will stretch out, and when you do the pull through, it'll tend to "seize up" on you.

Still... my mother made a huge square one (that's for another series of tutorials, probably NEXT YEAR!) from yellow newspaper bags, and it was lovely. It worked as her doormat for about 10 years instead of the usual 40+, but hey, this is all about using things which would be wasted otherwise, and having fun... so if that floats your boat... anchors away!


Online Videos by Veoh.com

Friday, November 23, 2007

Making a memory rug using the toothbrush rug technique

One the best things about this craft is you can use it to make a "memory rug" using clothes which are no longer usable, but which have sentimental value.

This is one I'm making from the clothes (including lingerie) my wife and I wore when dating and when newlyweds... its my largest in years, and IMHO my most artistically spectacular


Part 1


Online Videos by Veoh.com

Part 2


Online Videos by Veoh.com

Part 3


Online Videos by Veoh.com

Thursday, November 22, 2007

Needle making lessons- Guest video tutorials& my expanded commentary on them

Well well, there seems to be one other person out there on the web talking about this! I found these video tutorials on Youtube. They're nice as far as they go, I've added my additional comments below them, but kudos to her! Her site seems to be part of some class project, but whether she's the teacher or student I've not figured out.


My additional comments


I've used the same kind of toothbrush for one of my needles! I like to finesse it a bit by using angled wire/tin snips to make two angled cuts.

I'll also sometimes use a fine toothed saw such as one would use on metal to create guiding grooves, so the brush doesn't splinter (as has happened to me on several occasions when I've tried to "brute force" it like this.

I especially love then sticking it in an old fashioned pencil sharpener, the kind with a handle you crank, not the shoddy little razor blade ones, to do the rest of the sharpening. This has yielded my best needles, and saves a LOT of work. But kudos to you for putting this up here, this is a grand old craft, and so "green" too, since you make it out of things which would otherwise be discarded.


Next, her tutorial on sanding the toothbrush


My comments:

I usually use a knife (if I don't have access to one of those wonderful old pencil sharpeners) to hone the needle to the general shape I want or the person for whom I'm making it desires first, then sand it.

Enlarging the hole (assuming you started with a brush which had one.)


My comments:


That's a great idea, BTW, for how to enlarge the hole. I've never tried sandpaper, I usually use one of the specialty craft knives I have to enlarge it. I almost always do enlarge my holes since I use such a wide range of "fabrics"- from blue jeans to old shower curtains to plastic bags.

For brushes without holes, I've tried using power drills, but thats a bit dicey... I prefer to use an awl, which is the main tool I use to enlarge the hole also. That failing, a very small short bladed knife will do- to create the hole, use the point as a drill, then once you're though keep going until its large enough. You'll probably need to sand or file down the edges around the hole.

Wednesday, November 21, 2007

My old introduction to the craft- will be supplanted by combined video/text, but a good enough primer for now

Editorial comment: 11/21/07 - I've given up on renaming the craft "recycling rugs" but you'll see the term in this document. The craft been around too long, and is too well known as "toothbrush rugs" or "toothbrush handle" rugs. I 'll just find other ways to emphasize the recycling / green aspects of the craft!

I've started doing video tutorials, and this document will ultimately be supplanted by combined text/video posts of the various aspects of the craft, but I put it up because other than my silly idea that I could rename an ancient craft, its good as far as it goes.

But I'm a bit older and wiser now, and with video technology at my disposal, I think that's the way to go!


Rugs 101 By by Peter A. List
How to make a “Toothbrush Handle rug” or a “Recycling Rug” with cast offs, a needle made from a toothbrush, and a very little bit of skill


© Copyright 2001-2007 - Creative Commons License applies.

“What is this called”
To the best of my understanding (11.21.07 addition) ... the proper name is “Naalbinding,” but since almost no one out of Society for Creative Anachronism folk, avid crocheters, and lovers of Viking ways and history know of it that way, I’ll stick with the more common “Toothbrush handle rugs,” or simply "toothbrush rugs".


1) Most new toothbrush handles don’t work! Sure, they’re fine for teeth, but try smoothing one into a needle the shape of a very long canid tooth, drilling a hole in one end, and using it for several thousand stitches.
The term was always a bit humorously confusing, but its becoming an anachronism, and really means nothing to younger “Gen-Xers” and “Gen-Y.”
2) Since the old term is long in the tooth, I thought it would be good to give it a new name which would capture the beauty of the craft and the attention of people in the twenty-first century.

“Where did it come from?”
Naalbinding is a Scandinavian craft which predates the region’s written history. How it came to be a folk craft done by people in 20th century Indiana I don’t know? My family learned it from a disabled man in Valparaiso Indiana who made and sold them to survive during the Great Depression in the 1930s.


“Why tooth-brush handles?”
They make great needles. They’re just the right size, and the simple ones don’t take a lot of work to convert to a needle.
What’s great about it too is that even the needle is a reuse of a simple, common, throw-away.
The best are usually gentle tapered, but have a nice point, like a spear head.
For plastic I like the sharper and more narrow ones.

“What can be used?”
Nearly any not knit materiel can be used. Sweaters and the like are totally out- they unravel.
That being said, some fabrics and clothes are easier to start out with...


[Basic]
- Larger, longer clothes, or even old curtains or sheets, just because there are fewer seams etc. to cut around.
- Normal weight cotton, cotton poly– they don’t streatch too much, are easy to cut, easy to pull.
Cut them into strips about 3/4ths of an inch wide, depending on weight of fabric, and how thick you want the rug to be, and as long as you can.
[Advanced]
- Heavier fabrics like jean or denim.
Cut them no thicker than ½ inch, and be prepared to work a lot harder pulling them through.
The results are quite impressive- my sister made a blue-jean rug that was a wonder!

- Plastic bags, especially grocery bags.
Cut the handles off, and the bottom seam. Then make one cut through what’s left to make your strip.
For bags with “ribs”, cut off the handles and make two cuts along the side of the bag to create the strip. This will work OK, but the seam in the strip can catch and make the pull-through more difficult.
I’ve not found that any other type of plastic bags work so well- newspaper wrappers are a bit sticky, and stretch out too much. Thicker bags like the ones we use in the bookstore also have a tenancy to stretch out, and are hard to pull.
So initially, until you’re used to working with plastic, I highly recommend that you stick with normal grocery bags.


[Way Advanced]
- Hosiery [men’s or women’s], clothes with Lycra® or other stretchy materiel.
Mind you, the results are phenomenal, these make rugs that your feel can’t wait to walk on, and the dark and neutral colors most of the items come in almost always work very well together, but...
Since these fabrics stretch out, special care has to be taken when using them. You need to make sure that when you do the actual stitch, even though you’re pulling the fabric through, you’re not stretching it out. Otherwise, the rug will tend to cup up, you’ll have to use a lot of double stitches [see below], and so on.
My advice is very much to make a few “normal” rugs so you get the feel of how it should go before venturing on to this.
Cut shorter strips, no more than 2 feet long, and wider- 2 inches or more, depending on the thickness of the garment. Spiraling down a sock or piece of hosiery is fine, but I’d still advise cutting it into shorter segments until you really have the feel for how these behave.

So from here on out, I’m going to assume we’re just using normal weight cotton or cotton-blend fabric. This is easiest to start, there’s a lot of it around, and once you’re used to working with it, you develop a feel for how the rug should be going, so you can experiment with other materiels and fabrics.

I’m going to assume we’re starting with a “rug start”, a small rug that has a few rows done. That way, you can concentrate on the stitching, and get used to how incredibly easy and forgiving this craft really is!
How to do it!
The stitch
The loops:
There are three loops you will always be working with:
1) The “bottom loop” is the top edge of the row that you’re sewing along.
2) The “top loop” is the top loop of the advancing row.
Each row has two loops. Don’t worry about the middle one- if you put the needle through it though, it will be OK, its just not what you want to do most of the time.
3) The “thumb loop” is the fabric that goes around your thumb as you are sewing each loop. To complete the stitch, you will twist this over the needle.

The stitch:
1) Always start with your thumb in the thumb loop.
2) Put the needle up under the bottom loop.
3) While the base of the needle is still in the bottom loop, put the tip in the top loop.
4) At the same time as you push the needle through the top loop, twist the thumb loop over the tip of the needle.
Advanced: If there is a joint in the loop, and twisting it one way, say, clockwise, puts the joint in front, just twist it the other way, that way the joint will be on the back.
5) Now put your thumb on the loops you just made, and pull the fabric through with the other hand, until you have a new thumb loop.

That’s pretty much it! There are just two other things you need to do, they’re easy.


Doubles & Joints
If you have to angle the needle very much between the bottom and top loops, then it is time for a double stitch. This is easy, but its important unless you want to make a hat or basket instead of a rug. Without double stitches, a rug will cup up.

Advanced: So if you want to make a hat or basket, put fewer or no doubles in, then let me know how it works, I’ve always thought that would be a fun thing to try!
This will happen a lot more often on early rows and on round rugs. As you get more rows done, you’ll need fewer. .If you are doing an oval or [very very advanced!] squared rug, there will be long stretches where you won’t need any at all
Some people count how many stitches they do between doubles, and decrease that as they go out each row. That’s OK, its how I started, but it isn’t necessary to bring math into this. To keep it easy, just follow my “rule of thumb.”
The rule of thumb: Hold you hand out normally, fingers together, thumb extended to its farthest natural position. See the angle your thumb is at compared to your fingers? If the needle looks that way compared to the rug, its time for a double stitch. (Or lay it flat, and if the needle pulls back at more than 30 degrees, its time- 11/21/07.)

How to do a double stitch
After you’ve done a stitch and you think its time for a double, instead of putting your needle through the next bottom loop, put it through the same bottom loop you just did. Then proceed as normal.
Advanced: Tips on plastic rugs and stretchy rugs
Plastic: With normal cloth, having too many doubles isn’t a huge problem. With plastic, it is. Plastic rugs don’t stretch as much as cloth ones do, so too many doubles can be a serious problem, causing the rug to buckle.
Instead of using many double stitches, try making larger, looser, ones.
Stretchy materials [hosiery, Lycra®, etc.]: Just the opposite. Since these tend to pull together a lot anyway, you’ll want to be more generous with doubles.
Again, a looser larger stitch will make this less of a problem.

How to add a new strip
One of the reasons these rugs are so durable is that they are totally held together with strips of cloth. That is even true when you join a new strip to an old one.
If you want, when cutting your strips, you can cut small slits in each end, running length wise, starting about 1/4 inch from the end [Advanced: for plastic, silk, or other less strong materiels, double the end over, and start the cut ½ inch from the end.]
In any case, the way you are going to add a new piece to the old is with these slits, so you need them there at some point or another.

Thread one end of the new strip through your needle.
Lay the other end on top of the old one, making sure that the slits line up.
Then bring your needle up under both strips, pull the new strip through, give it a good hard yank to make sure it is tight, and a joint will be formed between the two. That’s it! The worst that will happen is that you’ll forget to put the strips in the right order, or pull the needle from the wrong way– in which case, you just do it again the right way.
Advanced: The joint formed will be very strong, and if you’ve pulled it nice and tight, should slide easily through as you sew. Some people don’t like the look of a joint on the top of the rug, since it isn’t as smooth as the normal strip. You can trim the excess fabric, but you run the risk of the joint coming undone. Much better is to use my “reverse thumb twist” trick, above, to make sure the joint is on the bottom.
If you really want to get picky, you can even make sure the joint will be inside the loops by how tightly you pull the last few stitches of a strip, or by cutting it off so that all that is left outside of the rug is the tip and the slit of the old piece. That method produces the cleanest, most consistent results, but is also the most work. If its worth it to you, then do it, otherwise don’t worry about it.

More Thoughts
Round, oval, square?
Most rugs (or chair mats or hot pads) people do are round ones. They come from a short start (a braid or chain stitch under 4 inches long) and are visually very nice.
An oval rug isn’t any harder to make, it just comes from a longer start, much longer. To get a yard long oval rug, you’ll want your start to have been 10 to 14 inches. Besides that, though, they are actually a bit easier to make because when you aren’t on one end or the other, you don’t have to worry so much about doubles.
Square and rectangular rugs are several orders of magnitude harder than any other kind. No one I knew even attempted it. After 10 years of making the rugs, when I finally started making rug starts, I figured out how it could be done.
Since this is “Rugs 101" I’ll not go into details, but the basic concept is that you double back on the row, instead of spiraling around. When that makes sense to you, you’re ready to try it.

Why not start with starts?
Because they are the hardest thing to do, hands down. They’re really the only tricky part of ever making these things. Everyone I know who has learned had someone else make the first starts they used. I was doing it 10 years before I tackled it (of course, I had three expert rug makers always willing to make me a start, too!)
The reason way the start is so hard is, until you know how a normal stitch should go, its awfully hard to know if what you’re doing is likely to produce one.
Again, this is “Rugs 101" I won’t go into the details, but the basic concept is:
You start with a chain stitch or a braid.
Once that is long enough (see “round/oval” above), you just arbitrarily pick a thumb loop, a bottom loop, and a top loop, and start sewing. The first row, especially the ends, involves a lot of double or even triple stitches.
If that makes sense, you’re ready to try it.

Care
Caring for these rugs is as easy as making them. Vacuum them, throw then in the washer, what ever. One thing that ought to be obvious but I just learned the hard way 2 years ago is- if the fabric in your rug wasn’t color fast before you made it into a rug, it won’t be color fast in the rug either. If you throw it in the washer, the rug will come out a nice new tint. Likewise, if you wash it with something that isn’t color fast, you can expect that color to become part of your rug.

Patterns & Designs
One word: Yes. You can do what ever you want. Some people have a particular image in their mind, and work from that. Others want alternating rows or strips of color. Some use math. The easiest way is to get a bunch of strips of colors which all go well together, toss them in a bag, and take pot luck, but you can put as much work and thought into the design as you want.

Other uses
Very small rugs, barely beyond starts, work great as hot pads.
Small rugs work great as chair mats.
Plastic rugs are great in the bathroom, kitchen, or as a doormat.
I’m sure someone else will come up with new uses I’ve not found. If you do, let me know!

By now, if you know anything about sewing or knitting or crocheting, you probably understand more about this than I ever will. I am totally non-gifted at those things. I can do this because it is easy and forgiving. An extra double stitch, a stitch through the middle loop, even a skipped stitch, none will matter in the long run. Every rug I’ve made has had mistakes, and I can’t find any of them to point out to you now. [Advanced: Except for the plastic oval rug I put way too many doubles in– I wound up giving it to my mother to use under her car tires in the snow, it was that rippled!]

Sunday, November 18, 2007

Video tutorial: Starting a rug from a braid

I'm VERY pleased with how this turned out, though I had to really work hard to find a site which would host it, given its file size.

Anyone with any basic sewing skills should be able to follow the instructions, and start a rug.


Online Videos by Veoh.com

Questions, comments?

Blog Directory